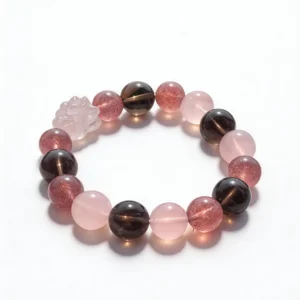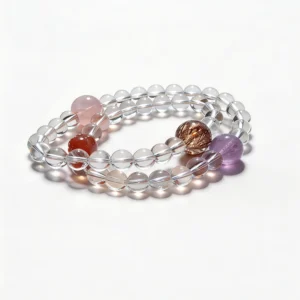


A wearable crystal bracelet stack is built by comparing measurable details: wrist size, usable wrist space, bead diameter, strand construction, hardware clearance, and the order of each bracelet. Start with two strands, test them during ordinary movement, and add another only when the group remains comfortable and visually clear.
Give Each Bracelet a Clear Role
Choose an anchor strand first. This is the bracelet that sets the main color, bead scale, or material for the group. A second strand can provide contrast through a lighter color, smaller diameter, different translucency, or a restrained metal detail. When every bracelet competes to be the focal piece, the stack can appear crowded and its hard components may repeatedly strike one another.
List the visible facts for each candidate: material name, dominant color, bead diameter, finish, strand type, and any charm or spacer. These details make it easier to compare how pieces work together without relying on broad symbolic descriptions.
Measure the Wrist and Usable Stack Area
Wrap a flexible tape around the wrist where the first bracelet will sit. Record that measurement without pulling the tape tight. Then measure the section between the wrist joint and the point where a sleeve or watch normally rests. This second number is the usable stack area.
Compare both measurements with the seller’s finished-size method. A bracelet that fits well alone may move differently when neighboring strands occupy the same space. The QZZEN size guide provides a starting method for recording wrist size before selecting a bracelet.
Build a Bead-Diameter Progression
Bead diameter affects height, weight, and spacing. A group of 6 mm and 8 mm strands usually produces a smaller step between surfaces than a group of 6 mm and 12 mm strands. A large jump can create a deliberate focal point, but it can also make the larger bracelet ride over the smaller one during movement.
Write the diameter of every strand in order before purchase. Product photographs can make beads look larger or smaller depending on camera distance. A ruler image, wrist view, and stated measurement are more useful than a close crop alone.
Arrange Color by Hue, Value, and Translucency
Color comparison works best when separated into three observations. Hue describes the color family, value describes how light or dark it appears, and translucency describes how much light seems to pass through the bead. Two purple strands may still look distinct if one is pale and translucent while the other is dark and opaque.
Use one shared characteristic to connect the group. That might be a repeated neutral bead, similar metal color, or a gradual move from light to dark. Review photographs under ordinary light because edited product images and screen settings can shift the appearance of a palette.
Mix Surface Finishes Without Creating Friction
High polish, matte surfaces, faceted beads, carvings, and metal spacers reflect light differently. Combining two finishes can create separation even when the colors are close. Inspect the edges, however, because a faceted or carved component may rub against an adjacent polished bead or plated spacer.
Look closely at drill openings, bead rims, and the surfaces that will touch neighboring strands. Small natural features can be expected in many materials, but large chips, sharp edges, or exposed cord are construction concerns rather than styling details.
Place Charms and Spacers With Clearance
A charm changes how a stack moves. Record its length, attachment type, and resting direction. A long pendant-style charm may catch a cuff or strike a watch case, while a small fixed focal bead stays closer to the strand. Check jump rings and connectors in close photographs instead of assuming that every gold- or silver-colored part uses the same metal.
Place one prominent moving element in the first version of a stack. If two bracelets both use dangling charms, test whether they cross or snag before adding more. Spacers can divide color groups, but hard metal parts should not be positioned where they repeatedly scrape another bracelet.
Choose the Order From Hand to Arm
The strand nearest the hand experiences frequent movement and contact with desks, bags, and sleeves. A low-profile bracelet with secure construction often works well in that position. Place a larger or more decorative strand farther up the arm if that arrangement keeps it away from a watch crown or keyboard edge.
Try more than one order because strand behavior depends on fit as well as appearance. Photograph each arrangement from above and from the side. The side view reveals height differences and overlap that may not be obvious in a flat product image.
Inspect Every Strand as a Separate Product
A stack is only as reliable as its individual construction. For stretch bracelets, review cord condition, even spacing, and the finished knot area. For clasped bracelets, inspect the clasp, crimps, jump rings, and the connections between hardware and strand. Confirm whether metal components are plated, filled, sterling silver, stainless steel, or an unspecified alloy when that information is available.
Material names should also remain specific. Natural origin does not automatically mean unprocessed, flawless, rare, or independently verified. Look for direct disclosure of dyeing, coating, heat processing, reconstruction, or synthetic components when applicable.
Run a Short Movement and Contact Test
- Wear the first bracelet alone and note where it rests on the wrist.
- Add the second strand and rotate the wrist through typing, reaching, and putting on a sleeve.
- Check whether beads ride over one another or hard parts make repeated contact.
- Review the skin-side surfaces, cord, clasps, and charm attachments after the test.
- Add another strand only after the two-piece arrangement remains usable.
This sequence isolates the source of movement or contact. Testing four bracelets at once makes it harder to identify which size, closure, or component is causing the problem.
Compare Listings With One Stack Worksheet
- Exact material wording and processing disclosure
- Bead diameter and finished bracelet size
- Stretch cord, clasp, or other strand construction
- Charm, spacer, and hardware dimensions
- Close photographs of drill holes and attachment points
- Natural variation explained without certainty claims
- Care guidance for the complete assembled piece
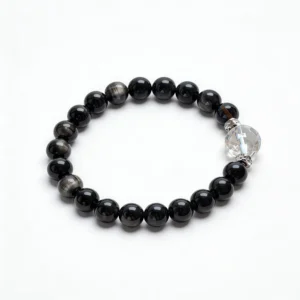
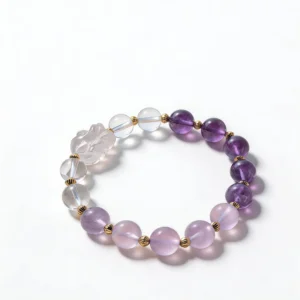
Apply the same worksheet across the QZZEN crystal bracelet collection. For scale and construction comparisons, review the 8 mm obsidian and clear quartz rune bracelet beside the 10 mm lavender amethyst and clear quartz bracelet.
Store the Stack as Individual Pieces
Separate bracelets in storage so polished beads, carvings, metal parts, and charms do not rub continuously. Keep product-specific instructions with the order record. Cleaning guidance should follow the most sensitive component in each assembled bracelet, including cord, elastic, plating, adhesive, and stone.
Review cords and hardware before rebuilding a frequently worn group. If a strand shows damage, remove it from the arrangement until it can be evaluated. A consistent storage and inspection process helps preserve both the visible surfaces and the connections between components.
Create With QZZEN
Preview One Bracelet Before Building the Stack
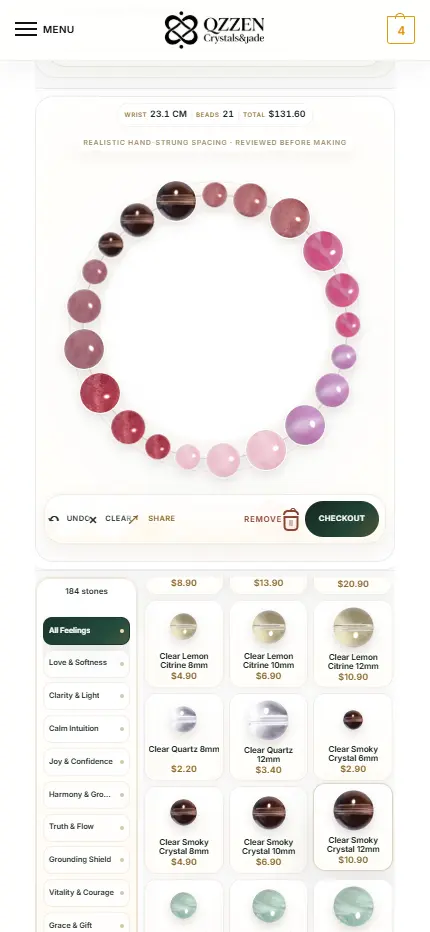
Use QZZEN Create to review a complete circular layout, bead scale, color sequence, and wrist measurement for one bracelet. Compare that foundation with the diameter, hardware, and clearance notes for the other strands you plan to wear.